Permalink: blogwithjawed.com/
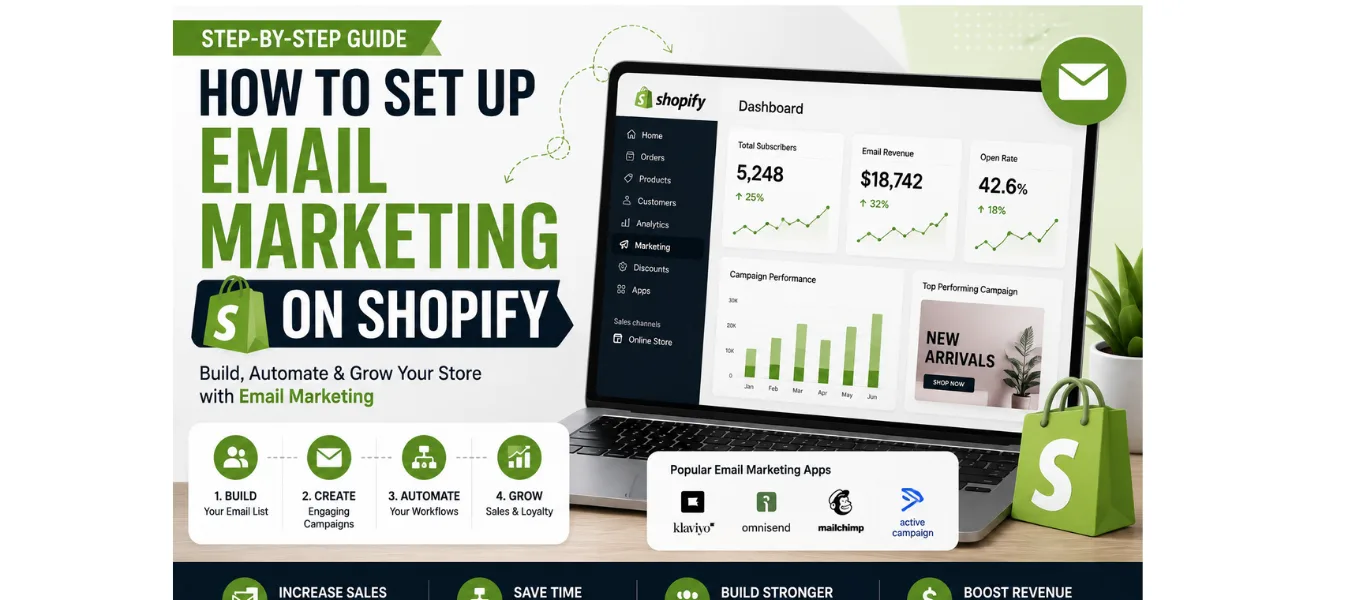
How to Set Up Email Marketing on Shopify — Step-by-Step Guide 2026
If you run a Shopify store and you are not doing email marketing, you are leaving the highest-ROI marketing channel completely untouched. Email marketing delivers an average return of $36–$42 for every $1 spent—more than paid social, more than SEO, and more than any other channel available to e-commerce store owners in 2026.
The good news: setting up email marketing on Shopify is simpler than most store owners think. You do not need to be a tech expert, a professional copywriter, or a marketing strategist to get your first flows running and generating revenue. You just need the right steps in the right order.
This step-by-step Shopify email marketing tutorial covers everything — from choosing the right platform and installing your app to building your signup form, creating your welcome sequence, and setting up the abandoned cart automation that will recover lost sales on autopilot from day one.
What you will have after following this guide: A fully configured Shopify email marketing setup with a working signup form, a welcome series that sends automatically to new subscribers, and an abandoned cart flow that recovers lost sales—all running without any manual work.
Why Email Marketing Is Essential for Shopify Stores in 2026
Before we get into how to set up email marketing on Shopify, it is worth understanding exactly why this is worth your time. Here is what email marketing does that no other channel can:
- You own your list: Unlike social media followers, your email list cannot be taken away by an algorithm change, a platform policy update, or an account suspension. Your subscribers are an asset you own permanently.
- Direct access to customers: Email lands directly in your subscriber’s inbox — there is no algorithm deciding whether to show it. When you send an email, your entire list gets it
- Highest ROI of any channel: The email marketing ROI for e-commerce consistently outperforms every other digital marketing channel—$36–$42 per $1 spent vs $2–$5 for paid social
- Automated revenue: Set up once, earn forever—abandoned cart flows, welcome sequences, and post-purchase emails generate revenue 24/7 without any ongoing effort
- Full data ownership: Your Shopify customer data—purchase history, browsing behavior, and cart activity—powers personalisation that no paid channel can match
With that context clear, here is exactly how to add email marketing to your Shopify store in eight proven steps.
STEP 1 Choose the Right Email Marketing App for Shopify | 15 minutes
The first and most important decision in your Shopify email marketing setup is choosing the right platform. The app you choose determines what automations you can run, how deeply your subscriber data integrates with Shopify, and ultimately how much revenue your email program generates.
Here is the honest comparison of the best email apps for Shopify in 2026:
| Platform | Best For | Free Plan | Our Rating |
| Klaviyo | Growing stores: $2K+/mo | 250 contacts | 9.5/10 |
| Mailchimp | Absolute beginners | 250 contacts | 7.0/10 |
| Omnisend | Best value mid-size | 250 contacts | 8.8/10 |
| Shopify Email | Stores under 10K sends | 10K sends/mo | 6.0/10 |
| ActiveCampaign | CRM + email combined | Trial only | 8.2/10 |
Which Platform Should You Choose?
- Just starting out (under $1,500/month): Shopify Email (free, built-in) or Mailchimp’s free plan. Both are beginner-friendly and cost nothing to get started
- Growing store ($1,500–$10,000/month): Omnisend—e-commerce-first automation at 30–40% lower cost than Klaviyo. Best value for this revenue stage
- Established store ($10,000+/month): Klaviyo—deepest Shopify integration, best revenue attribution, most powerful e-commerce automation available
Read more: Our full comparison of the best email marketing software for Shopify stores at blogwithjawed.com/best-email-marketing-software-shopify covers every platform in detail—pricing, features, and honest verdict for every store size.
PRO TIP: If you are completely new to Shopify email marketing, start with the free plan on Klaviyo or Shopify Email. You get full access to automation features and can upgrade when your list and revenue justify it.
STEP 2 Install and Connect Your Email App to Shopify | 10 minutes
Once you have chosen your platform, installing it is straightforward. Here is the process for the two most popular options:
How to Install Klaviyo on Shopify
- Go to the Shopify App Store and search for Klaviyo
- Click Install and follow the on-screen prompts
- Create your Klaviyo account or log into an existing one
- Klaviyo automatically syncs your store data—products, customers, and order history
- Verify the integration by checking that historical orders appear in your Klaviyo dashboard
How to Connect Mailchimp to Shopify
- Go to the Shopify App Store and search for Mailchimp
- Install the official Mailchimp for Shopify app
- Log into your Mailchimp account and authorise the connection
- Select which customer data to sync — email addresses, purchase history, and customer segments
- Verify the sync is working by checking your Mailchimp audience
How to Install Omnisend on Shopify
- Search for Omnisend in the Shopify App Store
- Click Install—Omnisend connects automatically using your Shopify store data
- Complete the onboarding wizard, which guides you through brand settings and sender details
- Verify the connection by checking that your product catalogue appears in Omnisend
PRO TIP: After installing any email platform, send yourself a test signup to confirm the integration is working before launching any campaigns to real subscribers.
STEP 3: Set Up Your Email Signup Form and Pop-Up | 20 minutes
Your Shopify email list building starts with a signup form. Without a way to capture email addresses, you have no list to market to. This step is where most beginners skip important details—here is how to get it right.
Types of Email Signup Forms for Shopify
- Pop-up form: Appears after a visitor has been on your site for a set time—typically 5–10 seconds or on exit intent. Highest conversion rate among all form types. Average conversion rate: 2–5% of visitors
- Embedded form: Placed within your page content — in your footer, on your About page, or within blog posts. Converts lower than pop-ups but captures visitors who specifically seek out signup options
- Landing page: A dedicated page with a single purpose — capturing email addresses. Best paired with a lead magnet (free guide, discount code, or resource)
- Checkout opt-in: An opt-in checkbox during the Shopify checkout flow. Captures email addresses from buyers at the point of highest intent
What Your Signup Form Must Include
- A compelling headline: Not ‘Sign up for our newsletter ‘—instead, ‘Get 10% off your first order’ or ‘Join 5,000 Shopify store owners getting weekly email tips’
- A clear incentive: Discount code, free shipping, free guide, or exclusive access—give visitors a specific reason to hand over their email address
- Single field: Email address only. Every additional field you add reduces your conversion rate by 10–20%
- Double opt-in: Send a confirmation email after signup to verify the address—improves list quality and is required for GDPR compliance in certain markets
PRO TIP: The single most effective incentive for a Shopify email pop-up in 2026 is a first-order discount code. Offer 10–15% off and your signup conversion rate will consistently outperform generic ‘join our newsletter’ forms.
STEP 4: Build Your First Email List Segment | 15 minutes
Segmentation is what separates Shopify email marketing that generates real revenue from basic list broadcasting. A segment is a subset of your email list defined by specific criteria—and sending targeted emails to the right segment dramatically outperforms sending the same email to everyone.
Essential Segments to Create First
- New subscribers (no purchase): People who have signed up but not yet bought—your welcome sequence target audience
- First-time buyers: Customers who have made exactly one purchase need a different sequence than repeat buyers
- Repeat buyers (VIPs): Customers who have purchased two or more times — your most valuable audience for upsells and exclusive offers
- Lapsed customers: Customers who have not purchased in 90+ days — your win-back campaign audience
- Cart abandoners: Visitors who added to cart but did not complete the purchase—your abandoned cart automation audience
How to Create Segments in Klaviyo
- Go to Lists and Segments in your Klaviyo dashboard
- Click Create Segment
- Set your conditions—for example, ‘placed order zero times’ for a new subscriber segment
- Click “Create Segment” and give it a clear name
- Klaviyo updates the segment automatically as your list grows
For a deeper dive into Shopify email segmentation and how to use it to personalize your campaigns, read our guide on email personalization tactics at blogwithjawed.com.
STEP 5: Create Your Welcome Email Sequence | 45 minutes
Your welcome sequence is the most important automation you will set up in your entire Shopify email marketing program—and it is the most opened email you will ever send. New subscribers open welcome emails at 50–60% — three times higher than standard campaign open rates.
Here is the proven 5-email welcome sequence structure for Shopify email marketing for beginners:
Email 1 — Instant — The Warm Welcome
- Send: Immediately after signup
- Content: Deliver your promised incentive (discount code or lead magnet) + warm brand introduction
- Subject line: ‘Welcome to [BRAND]—your gift is inside 🎁’
- Goal: Deliver value immediately. Set expectations. Build first impression
Email 2 — Day 2 — Your Brand Story
- Send: 24 hours after Email 1
- Content: The honest founder story — why you started the brand and what you believe in
- Subject line: ‘Why we started [BRAND] (the honest version)’
- Goal: Build trust and emotional connection before asking for a sale
Email 3 — Day 3 — Best Sellers Showcase
- Send: 48 hours after Email 1
- Content: Your top 3 products with benefit-led descriptions — not feature lists
- Subject line: ‘Our 3 most-loved products right now (and why)’
- Goal: Remove decision paralysis by curating your best options
Email 4 — Day 5 — Social Proof
- Send: 4 days after Email 1
- Content: Real customer reviews that answer ‘will this work for me?’
- Subject line: ‘5,000 customers love this—here is why’
- Goal: Remove doubt with specific, named customer testimonials
Email 5 — Day 7 — Last Chance
- Send: 6 days after Email 1
- Content: Final reminder that their discount or offer expires
- Subject line: ‘⏰ Last call—your welcome offer expires tonight’
- Goal: Drive first purchase with urgency and deadline
Full guide: Read our complete e-commerce The Welcome Email Sequences That Convert guide at blogwithjawed.com/ecommerce-welcome-email-sequence includes subject line examples, copy frameworks, and real sequence screenshots.
STEP 6: Set Up Your Abandoned Cart Email Flow | 30 minutes
The Shopify abandoned cart email setup is the single highest-ROI automation available to e-commerce store owners. Seventy percent of shoppers abandon their cart before completing a purchase—a well-configured email sequence recovers 5–8% of those lost sales automatically.
Here is the abandoned cart email setup framework that works across Klaviyo, Omnisend, and Mailchimp:
The 3-Email Abandoned Cart Sequence
- Email 1 — 1 hour after abandonment: Gentle reminder. Show the exact items in the cart with images and prices. Subject: ‘You left something behind…’ No discount yet—many shoppers just got distracted
- Email 2 — 24 hours after abandonment: Benefit-led follow-up. Remind them why they wanted it — lead with the outcome and feeling the product delivers. Subject: ‘Still thinking about [PRODUCT]?’
- Email 3 — 72 hours after abandonment: The close. Offer a small incentive if appropriate. Create urgency around stock or offer expiry. Subject: ‘⏰ Your cart expires soon—here is 10% off.’
How to Set Up Abandoned Cart in Klaviyo
- Go to Flows in your Klaviyo dashboard
- Click Create Flow and select Abandoned Cart from the template library
- The trigger is set automatically—Klaviyo fires when a cart is abandoned
- Customise the timing, copy, and design of each email in the sequence
- Turn the flow on and test it with your own email address
How to Set Up Abandoned Cart in Mailchimp
- Go to Automations and select E-commerce
- Choose Abandoned Cart from the automation options (Standard plan required)
- Connect your Shopify store if not already connected
- Customise the single abandoned cart email—add copy, product block, and CTA
- Activate the automation
Full guide: Read our complete How to Write Abandoned Cart Emails That Recover Lost Sales: covers timing, copy angles, and the full 5-email sequence framework.
PRO TIP: Never offer a discount in your first abandoned cart email. Many customers abandon carts out of distraction, not price objection. Wait until Email 2 or 3 before introducing an incentive—you save margin on shoppers who would have bought anyway.
STEP 7: Launch Your First Email Campaign | 30 minutes
With your automations live, the next step in your Shopify email marketing tutorial is sending your first broadcast campaign—an email sent to your whole list or a segment at a specific time.
Choosing Your First Campaign Type
- New product announcement: Tell your subscribers about a new product before it goes live—drives excitement and early sales
- Flash sale: A time-limited offer to your whole list—one of the highest revenue-generating campaign types in e-commerce
- Educational content: A helpful email that teaches your subscribers something valuable builds trust without directly selling
- Best sellers roundup: Showcase your top-performing products with benefit-led descriptions—works well as a first campaign to warm subscribers
Campaign Checklist Before Sending
- Subject line: Under 50 characters, contains a curiosity gap or clear benefit, tested with your email platform’s subject line tester
- Preview text: Complements the subject line—not a repeat of it. 40–90 characters that extend the hook
- From name: Your first name or brand name—not a generic ‘noreply@’ address
- Mobile preview: Check your email renders correctly on mobile—60%+ of e-commerce emails are opened on a phone
- CTA button: One clear call to action — not multiple competing buttons
- Unsubscribe link: Required by law in every commercial email—verify it works before sending
- Send a test: Always send a test to yourself before launching to your full list
PRO TIP: Send your first campaign to a small segment first — 10–20% of your list. If open rates are normal and there are no technical issues, send to the full list. This protects your sender reputation if something goes wrong.
STEP 8 Track Your Shopify Email Marketing Results | Ongoing
The final step in your Shopify email marketing setup is tracking the metrics that tell you whether your program is working — and where to improve. Here are the key metrics to monitor:
Email Marketing Metrics to Track
- Open rate: Percentage of subscribers who open your email. Ecommerce benchmark: 20–35%. Under 20% indicates subject line issues or list quality problems
- Click-through rate (CTR): Percentage of opens that click your CTA. Ecommerce benchmark: 2–5%. Under 2% indicates copy or CTA issues
- Revenue per email: The most important metric — how much money each specific email generated. Only trackable with e-commerce-native platforms like Klaviyo and Omnisend
- Unsubscribe rate: Percentage who unsubscribe after each send. Healthy benchmark: under 0.5%. Over 1% indicates you are sending too frequently or to the wrong audience
- Conversion rate: Percentage of email clicks that complete a purchase. Ecommerce benchmark: 1–3%
- List growth rate: How fast your email list is growing month over month. Aim for 5–10% monthly growth in the early stages
Where to Find Your Metrics
- Klaviyo: Dashboard → Campaigns or Flows → click any send to see full performance breakdown including attributed revenue
- Mailchimp: Reports section → click any campaign name to see open rate, click rate, and bounce data
- Omnisend: Reports → Email → select date range for full performance breakdown across campaigns and automations
- Shopify Email: Marketing → Campaigns → click any sent campaign for basic open and click data
Shopify Email Marketing Tips for Beginners — 8 Quick Wins
Once your Shopify email marketing is set up and running, here are eight quick wins that will improve your results immediately:
- Clean your list every 90 days: Suppress subscribers who have not opened a single email in 90+ days. A smaller, engaged list outperforms a large, disengaged one — and protects your sender reputation
- Send at the right time: Tuesday to Thursday between 9am–11am and 7pm–9pm consistently outperform other sending times for e-commerce emails
- Use plain text occasionally: Plain text emails—no images, no design—often outperform heavily designed HTML emails for personal-feeling flows like win-back sequences
- A/B test every subject line: Most platforms let you split-test subject lines automatically. Test two versions on 20% of your list and send the winner to the remaining 80%
- Personalise with first names: Using a subscriber’s first name in the subject line increases open rates by an average of 26%
- Set up your post-purchase flow: A thank-you sequence with review requests, upsells, and repeat purchase encouragement is easy to set up and drives significant repeat revenue
- Create a sunset flow: Automatically email disengaged subscribers and give them a final chance to re-engage before suppressing them—keeps your list healthy and your deliverability high
- Track revenue per email: Make this your primary success metric — not open rate. A 20% open rate that generates $500 is better than a 40% open rate that generates $100
Frequently Asked Questions
How do I set up email marketing on Shopify for free?
The best free Shopify email marketing setup options in 2026 are Shopify Email (10,000 free sends per month, built directly into your admin), Klaviyo free plan (250 contacts, full automation access including abandoned cart and welcome flows), and Omnisend free plan (250 contacts, 500 sends per month, email + SMS). All three are genuinely free with no credit card required and are sufficient for stores just starting to build their email list.
Which is the best email app for Shopify in 2026?
Klaviyo is the best email app for Shopify for stores doing consistent revenue above $2,000/month — its native Shopify integration, browse abandonment automation, and revenue attribution are unmatched. For stores just starting out, Omnisend offers the best value — comparable ecommerce automation at 30–40% lower cost than Klaviyo. Mailchimp is the easiest for absolute beginners but lacks ecommerce automation depth for growing stores. Read our full comparison at blogwithjawed.com/best-email-marketing-software-shopify
How long does it take to set up email marketing on Shopify?
Following this Shopify email marketing tutorial, you can have a basic setup — platform installed, signup form live, and welcome sequence active — in 2–3 hours. A complete setup including abandoned cart flow, post-purchase sequence, and first campaign takes approximately one full day. The time investment pays back quickly — most stores recover their setup time within the first week of abandoned cart automation running.
How do I build an email list on Shopify fast?
The fastest ways to build an email list on Shopify are a pop-up with a first-order discount offer (10–15% off converts at 3–5% of visitors); a post-checkout opt-in that captures buyer emails; a lead magnet—a free guide, product quiz, or exclusive content—hosted on a landing page; and social media campaigns driving traffic to your signup form. Combining a discount pop-up with a checkout opt-in is the highest-converting combination for most Shopify stores starting from scratch.
What email platform is best for Shopify abandoned cart emails?
Klaviyo is the most powerful platform for Shopify abandoned cart email setup — its real-time cart data sync, dynamic product blocks showing exact cart contents, and multi-email flow builder make it the strongest tool for cart recovery. Omnisend is the best value alternative—it includes abandoned cart flows comparable to Klaviyo at a lower cost. Mailchimp’s abandoned cart feature is available on the Standard plan but lacks the dynamic product personalisation of Klaviyo and Omnisend.
Full guide at Abandoned cart emails that recover lost sales
Do I need Klaviyo for Shopify email marketing?
You do not need Klaviyo specifically to run successful Shopify email marketing—but you do need a platform with e-commerce-native automation features. Klaviyo is the recommended choice for stores doing $2,000+/month because of its depth of Shopify integration and revenue attribution. For smaller stores, Omnisend or Shopify Email are equally capable starting points.
See our full breakdown of Klaviyo pricing — is it worth it for small stores? at blogwithjawed.com/klaviyo-pricing-worth-it-small-ecommerce
You Are Ready—Set Up Shopify Email Marketing Today
Setting up email marketing on Shopify is one of the highest-ROI investments you can make in your store’s growth. Following the eight steps in this guide, you will have:
- The right email platform installed and connected to your Shopify store
- A high-converting signup form capturing visitor email addresses automatically
- A segmented list that enables targeted, personalised campaigns
- A welcome sequence converting new subscribers into first-time buyers
- An abandoned cart flow recovering lost sales on autopilot
- Your first campaign sent, and results tracked
The most important thing now is to start. You do not need a perfect setup — you need a working setup. Get your signup form live and your welcome sequence active today. You can optimise, refine, and expand from there.
And remember: the platform is only as powerful as the copy inside it. High-converting welcome sequences, abandoned cart emails, and product campaigns require email copy that connects with your audience and drives action. If you need help writing email sequences that make your Shopify email setup perform at its highest level, visit blogwithjawed.com to learn how I work with ecommerce brands.
Related reading:
Best Email Marketing Software for Shopify
Ecommerce Welcome Email Sequences
Klaviyo vs Mailchimp for Ecommerce
Published on blogwithjawed.com | Written by Jawed Iqbal | Email Copywriter for Ecommerce Brands